What's the Difference Between {{ }} and {% %}? A Breakdown of Django's Template Language

Everything you always wanted to know about Django Template Language but were afraid to ask.


croolic
16 min read
Dec 3, 2020
On the begining we should answer the question: are we realy require any complicated stuff to show data on website using Django? Specially that we don't need to much to display page. The answer is: yes, Django template engine and its Django Temlate Language is worth to use. Why? Let's take a look on very simple view and its response which don't use template engine.
views.py:
star_wars_data.py:def ships_view(request):
    ship = {
        "name": "Millennium Falcon",
        "type": "YT-1300 Light Freighter",
        "owner": "Han Solo",
    }
    answer = """
         <html lang="en">
            <head>
              <meta charset="UTF-8">
              <title>IBoSS Registry</title>
            </head>
            <body>
              <h2>Imperial Bureau of Ships and Services Registry</h2>
              <p><strong>Name of ship:</strong> %s</p>
              <p><strong>Type:</strong> %s</p>
              <p><strong>Owner:</strong> %s</p>
            </body>
          </html>
        """ % (ship['name'], ship['type'], ship['owner'])
    return HttpResponse(answer)
Of course we have to as well define path in urls.py to show a page:
urls.py:
urlpatterns = [
path('ships/', ships_view, name='ships')
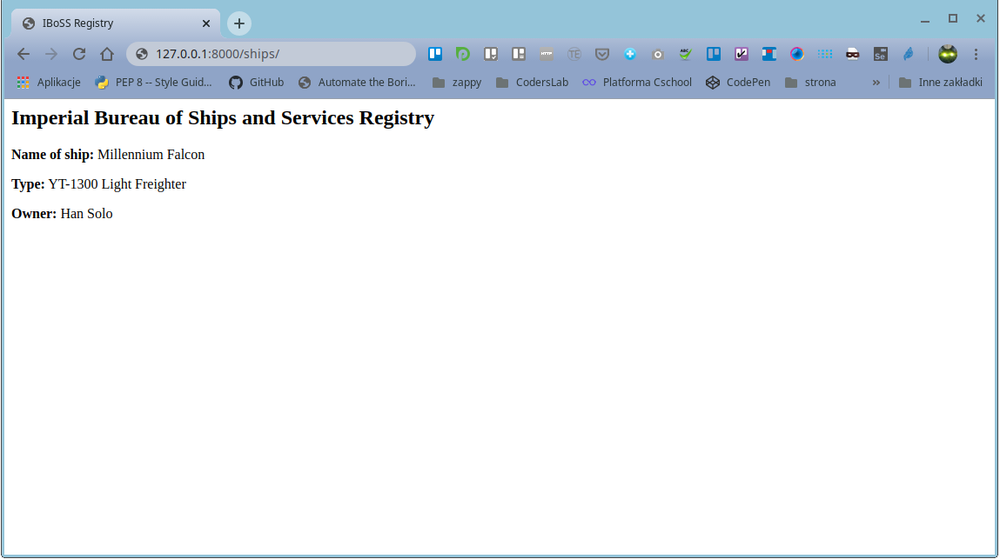
]After that we should see in the browser such output:

Site is displayed properly but our view is completely messed up - we mixed in one view frontend and backend which is no good. Could you imagine future maintaince when code will be really big? In such way it's very hard develop dynamic page. What we can do? We can use built-in Django template engine which allow to handle dynamic Python data in static HTML. We can easy pass variables and even input logic inside HTML. A template contains the static parts of the desired HTML output as well as some special syntax, called Django Template Language (DTL), which is saying how dynamic content should be handled. This will allow us for easy changing just style of our site without changing logic.
A Django template is a sequence of text that helps in separation of the presentation layer of a document from its data.
Remember the template files are text documents so they can have got not only .html extension but .csv or .json as well. The syntax of DTL involves four constructs: variables, tags, filters and comments. So let's stop boring theory and dive into two main constructs of DTL: variables and tags.
{{ Variables }}
All we need to render site with Django template engine are proper view and template files. Let's do it starting from a view.
views.py:
from django.shortcuts import render
def ships_view(request):
    ship = {
        "name": "Millennium Falcon",
        "type": "YT-1300 Light Freighter",
        "owner": "Han Solo",
    }
    return render(request, "tutorials/star_wars_data.html", ship)
A bit of explanation:
Dictionary ship is something we called context. We pass it to our template through parameters of render function (responsible for that is built-in context processor). Thanks to that we will be able to use keys of ship dictionary in our template file.star_wars_data.html is a template file. Django will fetch this file and render HTTP response to a browser with context - in our case it will be dictionary ship. This template file should be in right directory. How to setup templates you can find here: docs.djangoproject.com/en/3.0/topics/templates/Context is always dictionary! Even there is the only one string to pass we have to pass it as dictionary, i.e. context = {'name_of_variable': 'string_to_pass'}Our view is ready. Now we need to say Django how and where to insert variables from context into HTML. We will do this in template file using DTL syntax for variables. Names of variables are keys from context dictionary surrounded by doubled curly brackets. Exactly like that: {{ name_of_variable }}. So our template should looks like this:
star_wars_data.html:
<!DOCTYPE html>
<html lang="en">
  <head>
    <meta charset="UTF-8">
    <title>IBoSS Registry</title>
  </head>
  <body>
      <h1>Imperial Bureau of Ships and Services Registry<</h1>
      <p><strong>Name of ship: </strong>{{ name }}</p>
      <p><strong>Type: </strong>{{ type }}</p>
      <p><strong>Owner: </strong>{{ owner }}</p>
  </body>
</html>
{{ name }}, {{ type }}, {{ owner }} are names (actually keys) of variables from our ship dictionary declared in views.py Doubled curly brackets are just syntax of Django Template Language which are saying Django: here are Python variables.
If variable is not passed to template, Django will return object undefinedAfter all we can expect such output (we don't change path defined in urls.py from first example):
What is worth to remember with the context we can pass not only strings, numbers but as well objects, lists, tuples etc. Let take a look at example. We change a bit view and pass as context dictionary of tuples.
views.py:
def ships_view(request):
    ships = {
        "name": ("Millennium Falcon", "Tantive IV", "Ghost"),
        "type": ("YT-1300 Light Freighter", "CR90 Corellian Corvette", " VCX-100 light freighter"),
        "owner": ("Han Solo", "Princess Leia Organa", "Hera Syndulla")
    }
    return render(request, "tutorials/star_wars_data.html", ships)
If we use template star_wars_data.html, our site will render like that:
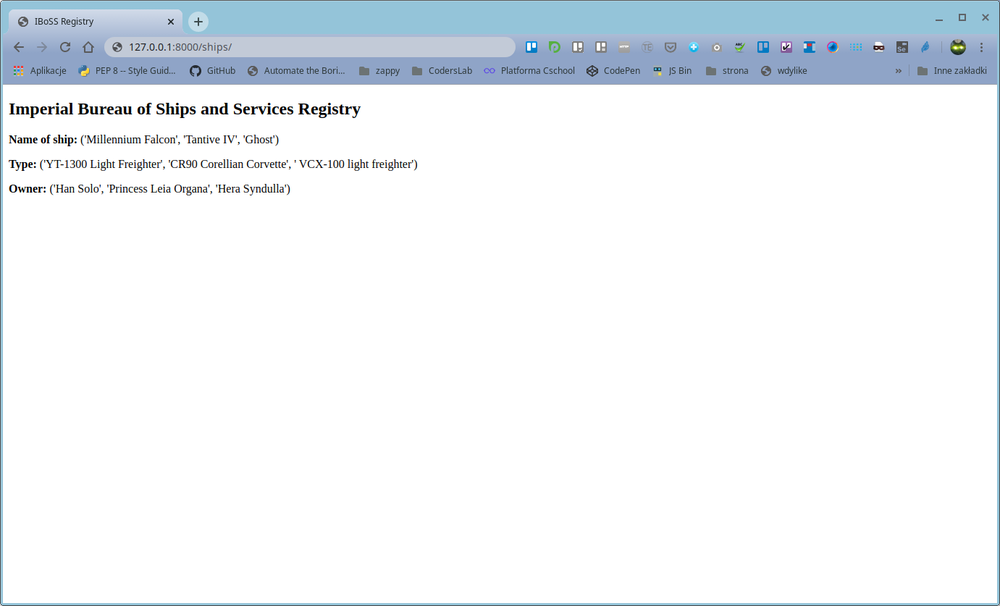
Not nice, isn't it? Django rendered all content of our tuples. But how to get just a one element of each tuple? In Python for dictionary and tuples we use such syntax with square brackets:
>>> ships['name'][0]
'Millennium Falcon'
>>> ships['name'][1]
'Tantive IV'Django Template Language don't use square brackets. The lookup role is playing just by '.' operator - yes i mean dot (it's why you cannot name variables with dots). To access a element of tuple we need add dot operator after key name: {{ name_of_variable.index_of_element }}. Let's take a look on our modified HTML template.
star_wars_data.html:
<!DOCTYPE html>
<html lang="en">
  <head>
    <meta charset="UTF-8">
    <title>IBoSS Registry</title>
  </head>
  <body>
    <h2>Imperial Bureau of Ships and Services Registry</h2>
    <p><strong>Name of ship:</strong>{{ name.0 }}</p>
    <p><strong>Type:</strong>{{ type.0 }}</p>
    <p><strong>Owner:</strong>{{ owner.0 }}</p>
    <hr>
    <p><strong>Name of ship:</strong>{{ name.1 }}</p>
    <p><strong>Type:</strong>{{ type.1 }}</p>
    <p><strong>Owner:</strong>{{ owner.1 }}</p>
    <hr>
    <p><strong>Name of ship:</strong>{{ name.2 }}</p>
    <p><strong>Type:</strong>{{ type.2 }}</p>
    <p><strong>Owner:</strong>{{ owner.2 }}</p>
  </body>
</html>
Now we can display all records of our database - each separately. Horizontal lines (<hr>) are added just for better readability.

With dot operator we can lookup not only attributes but methods as well, so remember not to use the same name for keys in dictionary and for the methods. Specially we can pass in views ORM objects grabbed from database called QuerySets. To do this let's define simple model in models.py:
models.py:
class StarShips(models.Model):
    type = models.CharField(max_length=30)
    name = models.CharField(max_length=128)
    owner = models.CharField(max_length=64)
Now we change view to get all records from database and pass them with the context to HTML template.
views.py:
def ships_view(request):
    ships = StarShips.objects.all()
    context = {
        'ships': ships
    }
    return render(request, "tutorials/star_wars_data.html", context)
We created QuerySet called ships which fetch all records from database. After we created dictionary context to pass it into the template. Now we are ready to show our QuerySet on the site. We need once again use name of the key in dictionary surrounded doubled curly brackets:
star_wars_data.html:
<!DOCTYPE html>
<html lang="en">
<head>
<meta charset="UTF-8">
<title>IBoSS Registry</title>
</head>
<body>
<h2>Imperial Bureau of Ships and Services Registry</h2>
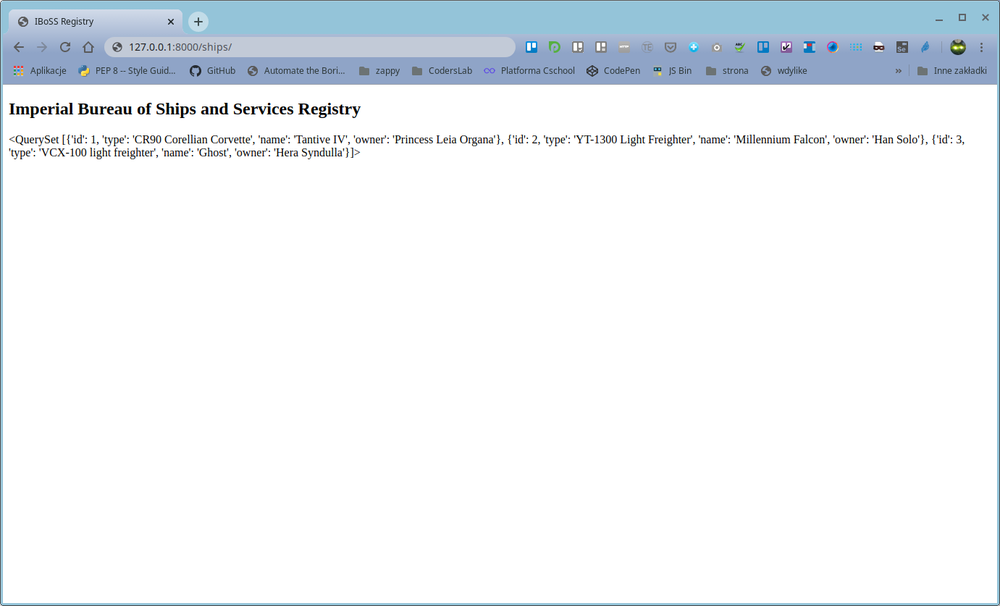
<p>{{ ships }}</p>
</body>
</html>And what we get in a browser?
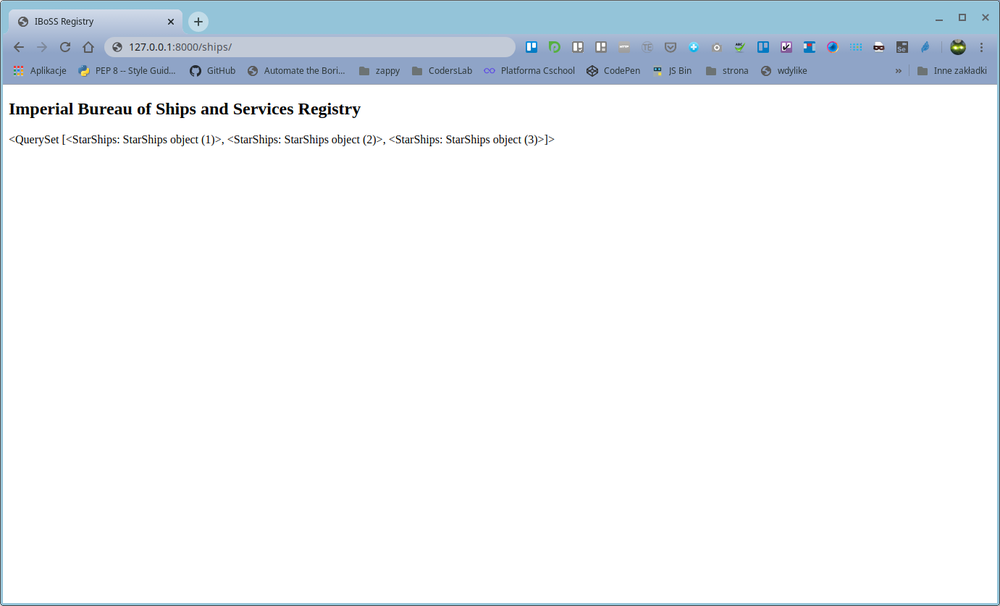
Oops. Output is really ugly. We only see names of objects. But we want to see values. Let's try to use QuerySet value method. Dot operator allow us to do this.
star_wars_data.html:
<!DOCTYPE html>
<html lang="en">
  <head>
    <meta charset="UTF-8">
    <title>IBoSS Registry</title>
  </head>
  <body>
    <h2>Imperial Bureau of Ships and Services Registry</h2>
    <p>{{ ships.values }}</p>
  </body>
</html>
Let's see what we get in a browser:
We have whole list of space ships. But once again it's very ugly display, we see structure of QuerySet but we don't want to. The set has got 3 elements (indexed 0, 1, 2) which are dictionaries. So, similarly like with tuples or lists, to lookup the one element we need dot operator followed by index of element we looking for. To lookup deeper we should use another dot. Our element is dictionary so to get just concrete value after second dot we should input name of key in dictionary (we got there 4 keys: id, type, name, owner). At this stage we are not going to use id key. Let's see this in practice:
star_wars_data.html:
<!DOCTYPE html>
<html lang="en">
<head>
<meta charset="UTF-8">
<title>IBoSS Registry</title>
</head>
<body>
<h2>Imperial Bureau of Ships and Services Registry</h2>
<p><strong>Name of ship:</strong>{{ ships.0.name }}</p>
<p><strong>Type:</strong>{{ ships.0.type }}</p>
<p><strong>Owner:</strong>{{ ships.0.owner }}</p>
<hr>
<p><strong>Name of ship:</strong>{{ ships.1.name }}</p>
<p><strong>Type:</strong>{{ ships.1.type }}</p>
<p><strong>Owner:</strong>{{ ships.1.owner }}</p>
<hr>
<p><strong>Name of ship:</strong>{{ ships.2.name }}</p>
<p><strong>Type:</strong>{{ ships.2.type }}</p>
<p><strong>Owner:</strong>{{ ships.2.owner }}</p>
</body>
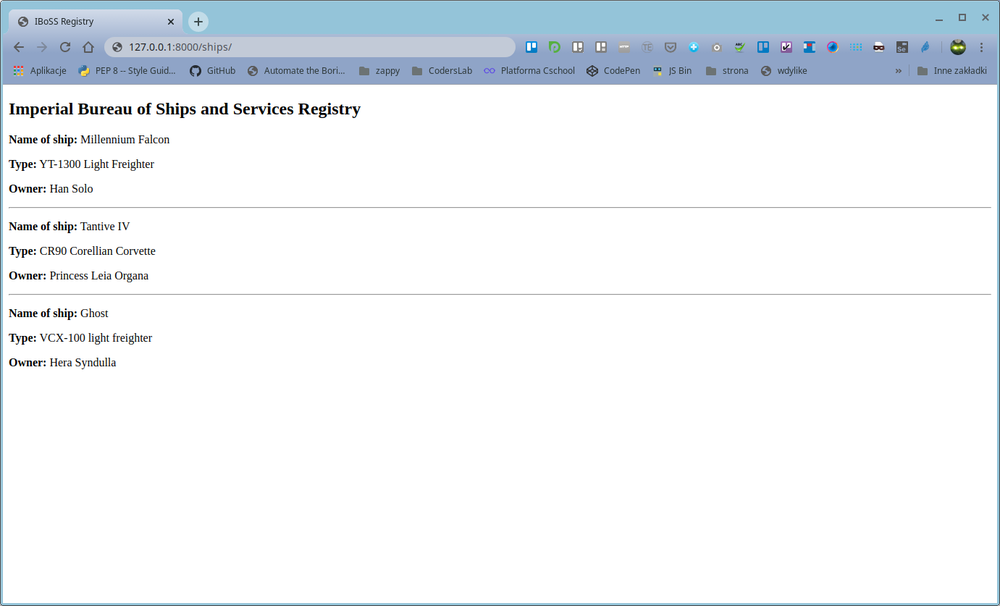
</html>Now we've got right display. Each element of QuerySet is showed separately:
Variables in templates can be modified by filters. Just after variable you need to give sign |. For example:{{ value|lower }}converts string to lowercase. You can use more than one filter:{{ var|escape|title }}. More details and all filters you can find here: built-in template filters.
For lucky our example database is not big - only 3 ships. But imagine registry with hundreds of ships! Coding HTML template could have been very tough and not nice thing. How to handle big database? With help is coming another main construct of DTL - tags.
{% Tags %}
A template tags are surrounded by {% and %}. Tags are more complex than variables and shortly they do something like a function. Some create text in the output, some control flow by performing loops or logic, and some load external information into the template to be used by later variables. Some example functions performed by template tags are:
- display logic
{% if %}...{% endif %} - loop control
{% for x in y %}...{% endfor %} - block declaration
{% block content %}...{% endblock %} - content import
{% include "header.html" %} - inheritance
{% extends "base.html" %}
{% for tag %}
How could it help us with displaying ships database? We use one of the most popular tag i.e. for loop. That loop works in the same way as for loop in Python. Let's then modify our HTML template:
star_wars_data.html:
<!DOCTYPE html>
<html lang="en">
<head>
<meta charset="UTF-8">
<title>IBoSS Registry</title>
</head>
<body>
<h2>Imperial Bureau of Ships and Services Registry</h2>
{% for ship in ships %}
<p><strong>Name of ship: </strong>{{ ship.name }}</p>
<p><strong>Type: </strong>{{ ship.type }}</p>
<p><strong>Owner: </strong>{{ ship.owner }}</p>
<p><strong>Registration number: </strong>{{ ship.id }}</p>
<hr>
{% endfor %}
</body>
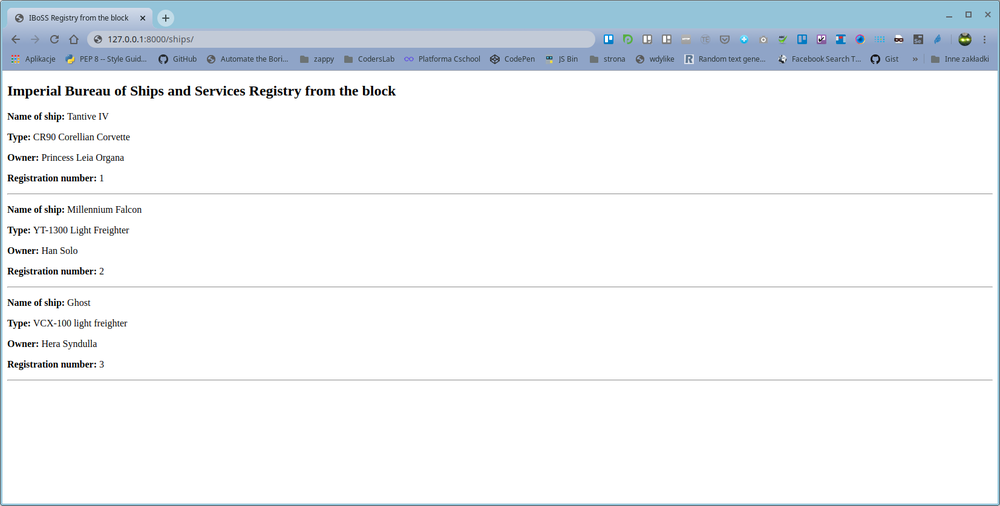
</html>Remember that inside {% %} we don't call variables with doubled curly brackets! We just call variable exactly like in PythonWe iterate through QuerySet ships so inside the loop we don't need to use indexesLet's check how the output looks like:

No to much coding, we not repeating code and have got all records from database in the browser. Nice. But what to do if there is not any record of ship in database? Django offer special feature empty in for loop.
star_wars_data.html:
<!DOCTYPE html>
<html lang="en">
  <head>
    <meta charset="UTF-8">
    <title>IBoSS Registry</title>
  </head>
  <body>
    <h2>Imperial Bureau of Ships and Services Registry</h2>
  {% for ship in ships %}
    <p><strong>Name of ship: </strong>{{ ship.name }}</p>
    <p><strong>Type: </strong>{{ ship.type }}</p>
    <p><strong>Owner: </strong>{{ ship.owner }}</p>
    <p><strong>Registration number: </strong>{{ ship.id }}</p>
    <hr>
  {% empty %}}
   There is no any ship in registry
{% endfor %}
As you can see some tags require beginning tag and closing tag (i.e. {% tag %} ... tag contents ... {% endtag %}).{% if tag %}
Another tag which require to be closed is if, elif, else tag, which control logic.
Below example use two variables ship from registry and non_registered_ship. if with context is passed ship Django will render ship data. if with context is passed non_registered_ship, Django will show everything inside elif statement. if both variables are undefined and return false, Django will show message inside else statement.
star_wars_data.html:
<!DOCTYPE html>
<html lang="en">
  <head>
    <meta charset="UTF-8">
    <title>IBoSS Registry</title>
  </head>
  <body>
    <h2>Imperial Bureau of Ships and Services Registry</h2>
    {% if ship %}
      <p><strong>Name of ship: </strong>{{ ship.name }}</p>
      <p><strong>Type: </strong>{{ ship.type }}</p>
      <p><strong>Owner: </strong>{{ ship.owner }}</p>
      <p><strong>Registration number: </strong>{{ ship.id }}</p>
    {% elif non_registered_ship %}
      Ship is not officially registered!
    {% else %}
      There is no such ship in databases.
    {% endif %}
  </body>
</html>
You can use operators with if tag. Here are all allowed: or, and, ==, !=, <, >, >=, <=, in, not, not in, is, is not. For example: {% if v > 1 %}{% elif value < 0 %}{% endif %}{% include tag %}
Let's check out another tag - maybe not so popular but very useful tag which is called include. It's a one of tags which doesn't require to closing tag. Include is the simplest way to use another template. Very simple way to avoid redundancy of code. We change our start_wars_data.html to show the power of include.
star_wars_data.html:
<!DOCTYPE html>
<html lang="en">
  <head>
    <meta charset="UTF-8">
    <title>IBoSS Registry</title>
  </head>
  <body>
    <h2>Imperial Bureau of Ships and Services Registry</h2>
    {% for ship in ships %}
     {% include 'tutorials/ship_data.html' %}
    {% endfor %}
  </body>
</html>
Now we need to create template file ship_data.html in tutorials template directory (but this file could be placed anywhere inside project). It's gonna to be very short file:
ship_data.html
<p><strong>Name of ship: </strong>{{ ship.name }}</p>
<p><strong>Type: </strong>{{ ship.type }}</p>
<p><strong>Owner: </strong>{{ ship.owner }}</p>
<p><strong>Registration number: </strong>{{ ship.id }}</p>
What is going to happen? Content of ship_data.html will be imported to star_wars_data.html and placed exactly inside for loop.
We don't need to change our views and urls. If we use our ships_view output should be like that:

Include tag is beautiful for importing content of files. But it's not inheritance - the most powerful thing offered by Django Template Language. To get it we need to use two another tags: {% extends "name_of_file" %} and {% block %}{% endblock %}. Let's check how it works.
{% extends and block tags %}
First we require create base template file - we name it base.html and place it in template directory:
base.html
<!DOCTYPE html>
<html lang="en">
  <head>
    {% block head %}
      <link rel="stylesheet" href="style.css" />
      <meta charset="UTF-8">
      <title>{% block title %}My website{% endblock %}</title>
    {% endblock %}
  </head>
  <body>
    {% block content %}{% endblock %}
  </body>
</html>
Block tags need to be closed by {% endblock %}.Now we just modify our star_wars_data.html, where we add extend tag and blocks.
star_wars_data.html
{% extends 'base.html' %}

{% block head%}
  <meta charset="UTF-8">
  <title>IBoSS Registry from the block</title>
{% endblock %};

{% block content %}
  <h2>Imperial Bureau of Ships and Services Registry from the block</h2>
  {% for ship in ships %}
    <p><strong>Name of ship: </strong>{{ ship.name }}</p>
    <p><strong>Type: </strong>{{ ship.type }}</p>
    <p><strong>Owner: </strong>{{ ship.owner }}</p>
    <p><strong>Registration number: </strong>{{ ship.id }}</p>
    <hr>
  {% endfor %}
{% endblock %};
We don't need to change views and urls. Inheritance allow us effectively separate frontend (design) from backend. So let's use our ships_view and check out output.
Remember if you don't override blocks from base.html, Django will display content from blocks in base.html. In our case if we don't overried block head, the title of page will be My website
We've said about only a few tags. But there are plenty of built-in tags which offer DTL. All you can find here: built-in tags.
Custom context processor
Imagine that we have got data which we want to use in every template in our Django application. For example we would like to show on any page actual date or version of the application. We can manage this in every view but it will be laborious and prone to mistakes. In such case the best way will be use custom context processor.
How to do that? First we need to define module where we will keep our processors. Let's create Python file called my_context_processor.py in our application directory (remember that you can create the file in any place inside the project). In this file we write function (or more if you want) which will have got one parameter - HttpRequest object. That function should return dictionary.
my_context_processor.py:
from datetime import datetime
    def my_cp(request):
    ctx = {
        "now": datetime.now(),
        "version": "1.0",
    }
    return ctx
Function my_cp is exactly our custom context processor. To make it accessible in whole our project we should register it in Django settings.py. Let's find TEMPLATES settings and add our processor to the OPTIONS key. Just like that:
settings.py:
TEMPLATES = [
    {
        'BACKEND': 'django.template.backends.django.DjangoTemplates',
        'DIRS': [os.path.join(BASE_DIR, 'templates')],
        'APP_DIRS': True,
        'OPTIONS': {
            'context_processors': [
                'django.template.context_processors.debug',
                'django.template.context_processors.request',
                'django.contrib.auth.context_processors.auth',
                'django.contrib.messages.context_processors.messages',
                'tutorials.my_context_processor.my_cp',
            ],
        },
    },
]
Why we add such line:tutorials.my_context_processor.my_cp?tutorialsis the name of application where the filemy_context_proccessor.pyactually is placed.my_cpon the end is just name of processor.
Now our processor should be visible and accessible in whole project. We can use all its keys in any template file. Let's check how it works:
star_wars_data.html:
<!DOCTYPE html>
<html lang="en">
<head>
    <meta charset="UTF-8">
    <title>IBoSS Registry</title>
</head>
    <body>
        <h1>Imperial Bureau of Ships and Services Registry</h1>
        <p><strong>Name of ship:</strong>{{ name }}</p>
        <p><strong>Type:</strong>{{ type }}</p>
        <p><strong>Owner:</strong>{{ owner }}</p>
        <footer>
          <hr>
          <em>
            Today is {{ now }};
            Version of registry: {{ version }}
          </em>
        </footer>
    </body>
</html>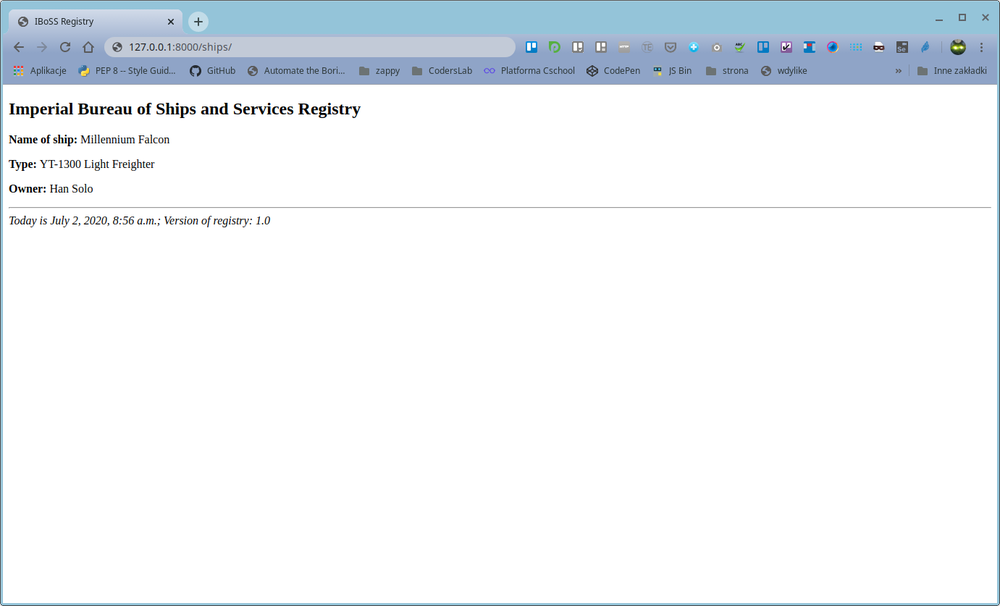
As you can see custom context processor could be very helpful and allow to avoid redundancy - repeating code. And the main thing - we can be sure that we will have got the same data on any page.
If you want to know more about Django Temlates Language just dive in Django docs: docs.djangoproject.com/en/3.0/ref/templates/