Deploy Django project on Heroku

There are a few ways to deploy projects on Heroku. In this guide we are not going to use Heroku CLI or any additional stuff from heroku, like django-heroku.


croolic
6 min read
Apr 21, 2021
All you need to deploy Django project on Heroku is:
- Free Heroku account
- GitHub account
Prepare Django project for Heroku
- Let's start with setting up static assets. First, add the line at the end of settings.py:
STATIC_ROOT = os.path.join(PROJECT_ROOT, 'static')2. To serve static files on Heroku we will use simple WhiteNoise package. Install it locally. Probably the best way is to do it in a virtual environment:
(todo) revorete@E7440:~/todowoo-project-drf$ pip install whitenoise3. Edit your settings.py file and add WhiteNoise to the MIDDLEWARE list. The WhiteNoise middleware should be placed directly after the Django SecurityMiddleware (if you are using it) and before all other middleware:
MIDDLEWARE = [
    'django.middleware.security.SecurityMiddleware',
    'whitenoise.middleware.WhiteNoiseMiddleware',
    # ...
]
If you want forever-cacheable files and compression support you can add in settings.py:
STATICFILES_STORAGE = 'whitenoise.storage.CompressedManifestStaticFilesStorage'4. Install Gunicron ('Green Unicorn') which is a pure-Python WSGI (Web Server Gateway Interface) server for UNIX:
(todo) revorete@E7440:~/todowoo-project-drf$ pip install gunicorn5. Add Procfile. This file specifies the commands to be executed when the program is starting up. While Django ships with its own WSGI server, our Procfile will tell Heroku to use Gunicorn to serve our application. The contents of this file will be:
web: gunicorn plaindjango.wsgi:application --log-file -6. You cannot push sensitive data to Github, so install django-environ to hide it. Later on Heroku we'll use a feature of the platform to create .env file which this package needs:
(todo) revorete@E7440:~/todowoo-project-drf$ pip install django-environ7. Now you need to edit settings.py to make environ working. Somewhere on the top add below lines:
env = environ.Env(DEBUG=(bool, False))
environ.Env.read_env()
and change a few settings:
SECRET_KEY = env('SECRET_KEY', default='ThisIsAWeakSauceSecretKey')DEBUG = env('DEBUG', default=True)ALLOWED_HOSTS = env.list('ALLOWED_HOSTS', default=[])If you don't want to keep the ALLOWED_HOSTS in .env file, you need to change it anyway:
ALLOWED_HOSTS = ['.herokuapp.com']Heroku, by default, uses PostgresSQL so you need to change DATABASES setting:
DATABASES = {
    'default': {
        'ENGINE': env.str('DB_ENGINE', default='django.db.backends.sqlite3'),
        'NAME': env.str('NAME_DB', default=os.path.join(BASE_DIR, 'db.sqlite3')),
        'USER':env.str('USER_DB', default=''),
        'PASSWORD': env.str('PASSWORD_DB', default=''),
        'HOST': env.str('HOST_DB', default='localhost'),
        'PORT':'5432',
    }

}
8. Now go to terminal and project root directory to create requirements.txt:
(todo) revorete@E7440:~/todowoo-project-drf$ pip freeze > requirement.txtPush the code to GitHub
9. I assume that you have got Git installed and you've already created Git repository. Stage changed files, commit them and push to Github:
(todo) revorete@E7440:~/todowoo-project-drf$ git add .
(todo) revorete@E7440:~/todowoo-project-drf$ git commit -m "heroku preparation"
(todo) revorete@E7440:~/todowoo-project-drf$ git push -u origin master
If you haven't created Git repository and pushed your project to GitHub, follow this guide to do it: Push changes to GitHub.
Upload code to Heroku and set app
10. Go to Heroku click 'Create new app'.
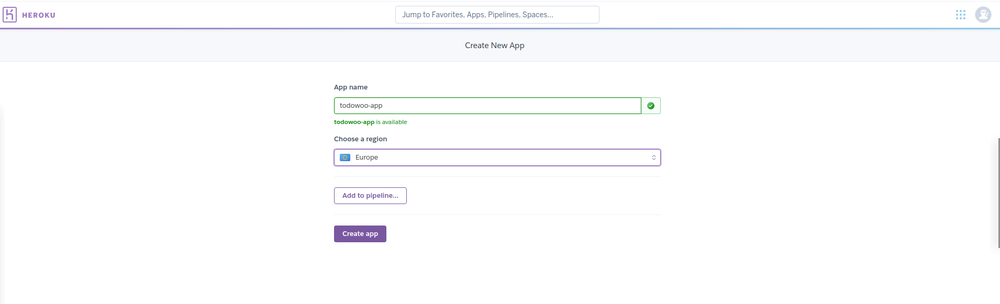
11. Name your app and click 'Create app':
12. Now choose Github in the Deployment method option, authorize connection. Then choose your repository and connect the repo with your app:
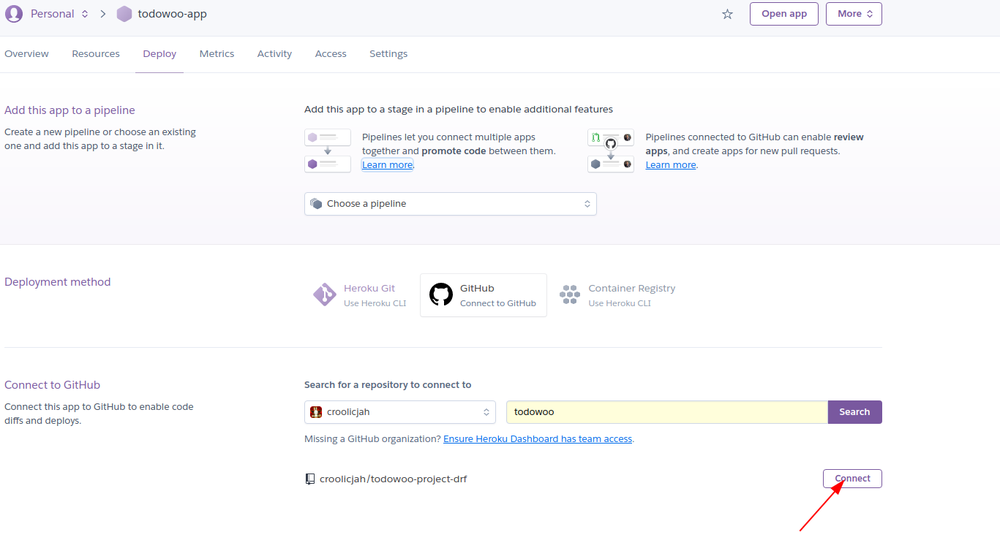
You don't need to add your app to pipeline (learn more about pipelines here)
13. After connecting the repository, you should see more options. Click Deploy button in the "Manual Deploy" option, you can as well enable automatic deploy if you want to. You should see message about successful deployment.
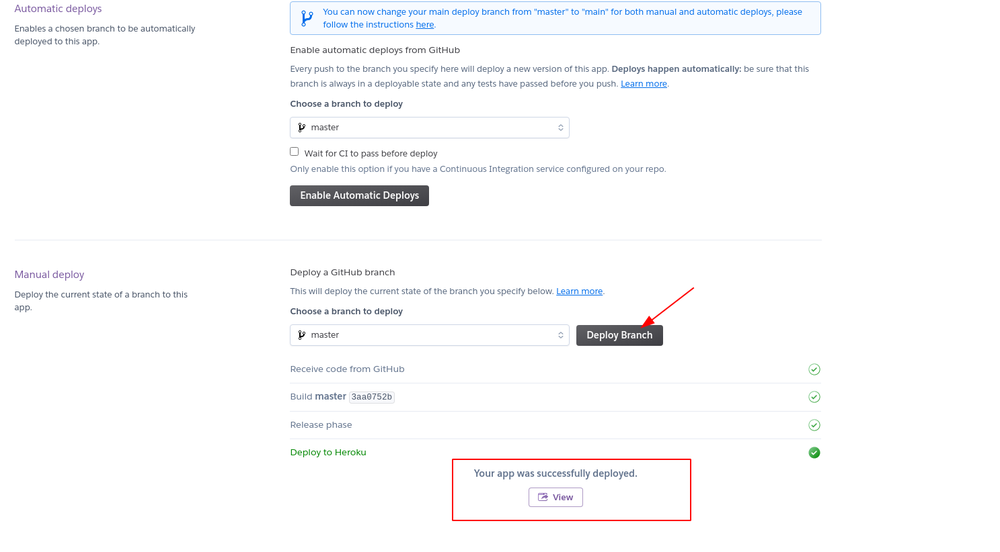
If you don't see a success message, it means there are some errors. So you need to check logs what's happened. On the top right just click the More button and "View logs".
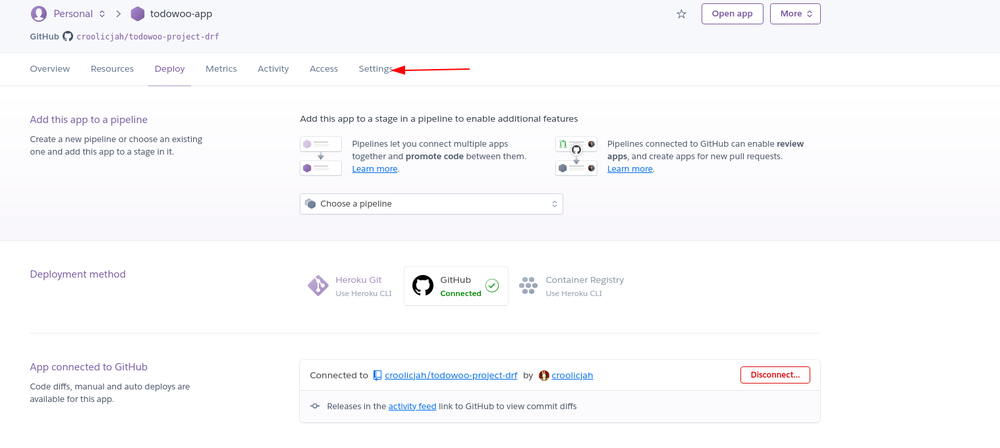
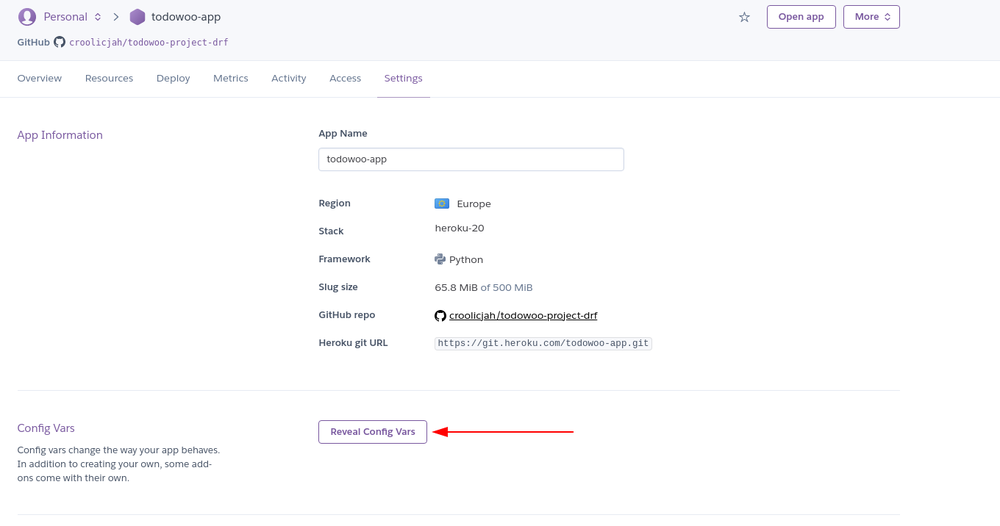
14. Now go to Settings tab:
15. Find Config Vars option and Reveal Config Vars:
16. Fill in all sensitive data which should be in .env file:
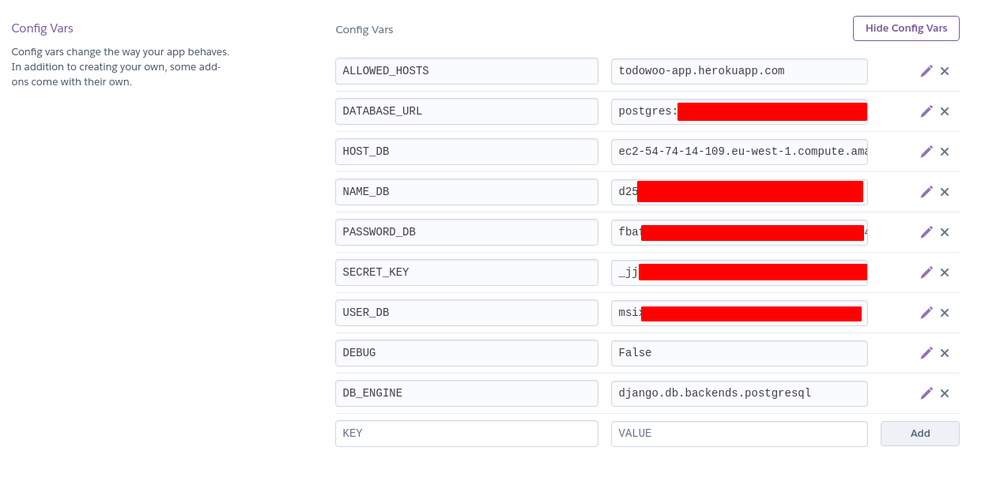
Database data u can find in Resources tab and click on Heroku Postgres:
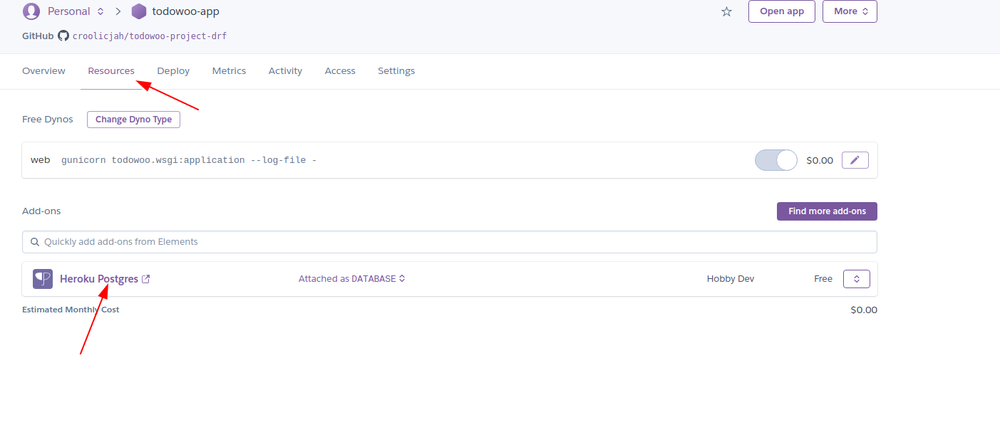
Then go to Settings, find Database Credentials and click view credentials:
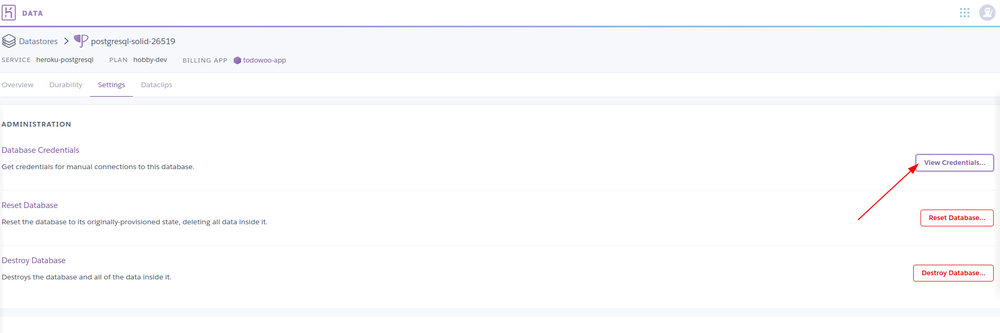
You find there name of database, user, password, host which you need to add to Vars.
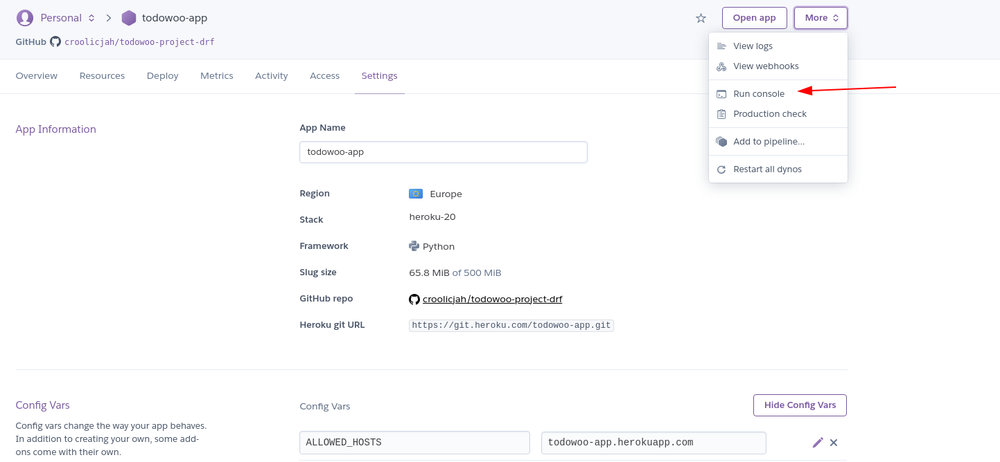
17. The very last thing to do is migration. Open More menu on the top right and choose run console.
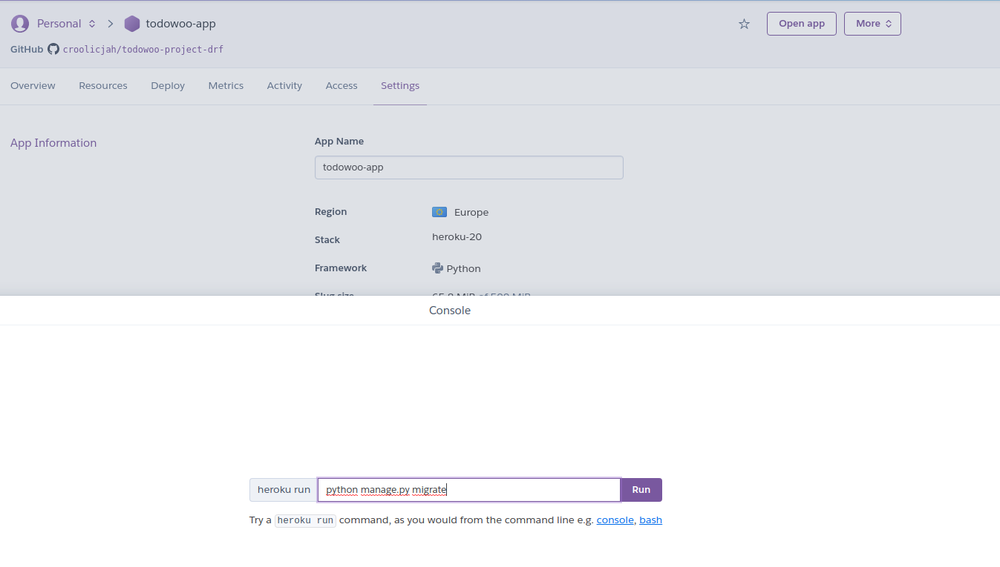
18. Migrate database by inputting: python manage.py migrate and clicking run:
That's it! Bravo and well done. The world is able to see your site.