Deploying Django project on Linux server (Ubuntu + Gunicorn + Nginx + Supervisor + Ufw)

We are going to deploy Django project on Ubuntu Server version 20.04 LTS (Focal Fossa) 64-bit with very minimal OS services.


croolic
9 min read
Apr 21, 2021
This guide assumes that you have got a similar server and Github account, where you push your code and your project is ready to clone - how to do this you can find here. We will use Gunicorn - Python WSGI HTTP Server for UNIX, Ufw - simple firewall, Supervisor - client/server system which allows to monitor and control processes on UNIX-like systems, Nginx - HTTP server and reverse proxy, IMAP/POP3 proxy server. We are going to use it mainly for serving static files. If you want something simpler to handle statics, choose WhiteNoise.
Initial server set up
- Open console/terminal (on your server, not local computer). Most probably you are root user. For security sake add new user:
$ useradd username2. Now add your new user to sudo group:
$ usermod -aG sudo username
3. Log as user you've just created:
$ su username4. Install pip, nginx, supervisor, ufw:
$ sudo apt install python3-pip nginx supervisor ufwOf course, you can install packages separately by running the install with only one package: sudo apt install python3-pip etc. There is a possibility that you could have some packages already installed on your server. Mine is very minimal, only with very basic services.
5. Install virtual environment with pip:
$ pip3 install virtualenv
You could sometimes face problems with permission here. Use then '--user' switcher:
$ pip3 install virtualenv --user6. Create a virtual environment. If you want, you can create a specific directory for your venvs. I'm going to create only one - called 'django' in /home directory :
$ virtualenv django7. Setup firewall. In step 4 we have installed ufw - uncomplicated firewall. Let's configure it. Open configuration file:
$ sudo nano /etc/ufw/ufw.confNow edit ENABLED option. Change it to 'yes' . It allows ufw to start with system. You can as well switch to 'yes' IPv6 protocol setting:
ENABLED=yes
IPV6=yes
Deny incoming connections, allow for outgoing:
$ sudo ufw default deny incoming
$ sudo ufw default allow outgoing
Start ufw:
$ sudo ufw enableMore about ufw configuration you can find here: Ubuntu firewall.
Copy to server, setup Django project and its environment
8. Activate virtualenv:
$ source django/bin/activatesome shells support '.' instead of 'source' . In such case, activate venv with such command:
$ . django/bin/activate9. Now you can clone your project from Github:
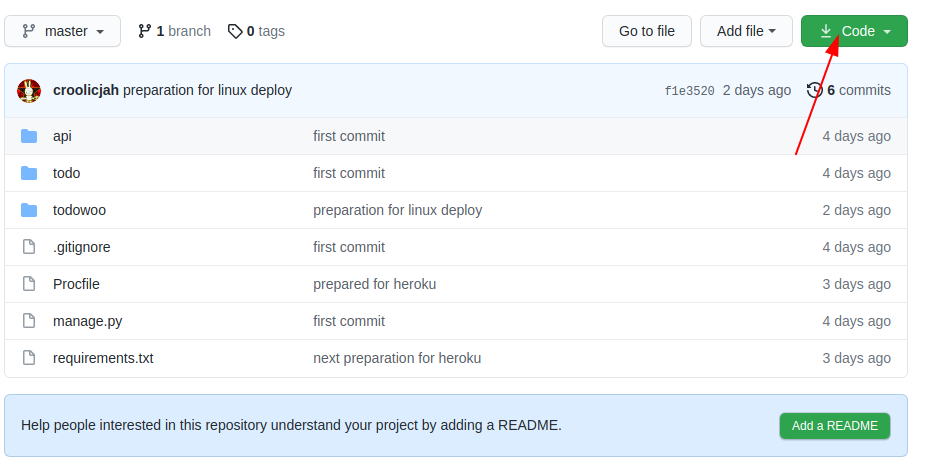
(django) $ git clone https://github.com/croolicjah/todowoo-project-drf.gitOf course, you need to replace link with your repository, as well u need replace github user. You can find link to repo on GitHub after clicking Code button:
My project tree looks like below:
todowoo-project-drf
 ├── api/
 ├── .git/</strong>
 ├── media/
 ├── todo/
 ├── todowoo/
 ├── db.sqlite3
 ├── .gitignore
 ├── manage.py
 ├── Procfile
 └── requirements.txt</pre>
6. If you have got requirements.txt inside your project., install it. First, enter the project root directory (where is manage.py):
(django) $ cd todowoo-project-drf
Now run the command below:
(django) ~/todowoo_project_drf$ pip install -r requirements.txtIf you don't have requirements.txt, you need to install Django and other packages manually:
(django) ~/todowoo_project_drf$ pip install Django
7. I'm using the default Django database - SQlite and all I need to do now is to make migrations:
(django) ~/todowoo_project_drf$ python manage.py migrate
If you want to use, for example, Postgres, you will need first to install it on the server. How to do this you find here: Install postgres on linux.
8. Go to the project directory where is settings.py file - in my case it is todowoo. Assuming you are now in root project directory run command:
(django) ~/todowoo_project_drf$ cd todowoo
9. If you are using local_settings.py or .env file, or any outer file where you keep sensitive data, create it now:
(django) ~/todowoo_project_drf/todowoo$ nano filename
Fill in your file with all needed data. For example my .env file looks like below:
DEBUG=False
SECRET_KEY=_jj_not_too_strong_secret_key-lsbno
ALLOWED_HOSTS=pomerania.tk, 63.250.59.207
Remember to save the file before exiting!
10. Open settings.py:
(django) ~/todowoo_project_drf/todowoo$ nano settings.py11. Add STATIC_ROOT setting at the end of file:
STATIC_ROOT = os.path.join(BASE_DIR, 'static')If you haven't got ALLOWED_HOSTS and DEBUG settings in outer file, modify them now:
DEBUG=False
ALLOWED_HOSTS=your_domain, your_host_IP
Remember to save the file before exiting!
12. If you haven't already, install Gunicorn now in your venv:
(django) ~/todowoo_project_drf/todowoo$ pip install gunicornWhen this is finished, you can test Gunicorn’s ability to serve your app:
(django) ~/todowoo_project_drf/todowoo$ gunicorn --bind 0.0.0.0:8000 todowoo.wsgi
13. Collect static files (go to root project directory - where is manage.py):
(django) $ cd ..
(django) ~todowoo-project-drf$ python manage.py collectstatic
14. Deactivate venv:
(django) ~todowoo-project-drf$ deactivateSupervisor configuration
15. Create Supervisor configuration file:
$ cd ..
$ nano /etc/supervisor/conf.d/gunicorn.conf
The sample below should work fine, but if you want a more finely tuned configuration file, head up to the Supervisor Docs.
[program:django_project]
directory=/path/to/django_project
command=/path/to/envs/django_project/bin/gunicorn django_project.wsgi:application --workers 3 --bind 127.0.0.1:8000 --log-level info;
stdout_logfile = /path/to/django_project/logs/gunicorn/access.log
stderr_logfile = /path/to/django_project/logs/gunicorn/error.log
stdout_logfile_maxbytes=5000000
stderr_logfile_maxbytes=5000000
stdout_logfile_backups=100000
stderr_logfile_backups=100000
autostart=true
autorestart=true
startsecs=10
stopasgroup=true
program:todowoo-project-drf]
directory=/home/croolic/todowoo-project-drf
command=/home/croolic/django/bin/gunicorn todowoo.wsgi:application --workers 3 --bind 127.0.0.1:8000 --log-level info;
stdout_logfile = /home/croolic/todowoo-django-drf/logs/gunicorn/access.log
stderr_logfile = /home/croolic/todowoo-django-drf/logs/gunicorn/error.log
stdout_logfile_maxbytes=5000000
stderr_logfile_maxbytes=5000000
stdout_logfile_backups=100000
stderr_logfile_backups=100000
autostart=true
autorestart=true
startsecs=10
stopasgroup=true16. As we instructed Supervisor to save logs in logs/gunicorn directory, we have to create both of them:
$ mkdir todowoo-project-drf/logs
$ mkdir todowoo-project-drf/logs/gunicorn
17. Re-read the configuration files and update Supervisor to start it:
$ sudo supervisorctl reread
$ sudo supervisorctl update
It can also be started manually using:
$ sudo supervisorctl start django_projectConfigure Nginx
18. Create new server block in Nginx’s sites-available directory:
$ sudo nano /etc/nginx/sites-available/todowoo-project-drfIn the file open up a new “server” block. We will be specifying that this block should listen on the normal port 80 and that it should respond to our server’s domain name or IP address:
server {
    listen 80;
    server_name pomerania.tk 63.250.59.207;
}
Next, we will tell Nginx to ignore any problems with finding a favicon. We will also tell it where to find the static assets that we collected in our ~/todowoo-project-drf/static directory.
server {
    listen 80;
    server_name pomerania.tk 63.250.59.207;

    location = /favicon.ico { access_log off; log_not_found off; }
    location /static/ {
        root /path/to/django_project/django_project;
    }
    location / {
        include proxy_params;
        proxy_pass http://127.0.0.1:8000;
    }
}
Save and close the file when you are done editing.
19. Enable our project by linking it to Nginx's sites-enabled directory:
$ sudo ln -s /etc/nginx/sites-available/django_project /etc/nginx/sites-enabledIf all went well, we could restart Nginx by typing:
$ sudo systemctl restart nginx20. Finally, open up firewall to normal traffic on port 80:
$ sudo ufw allow 'Nginx Full'
That's it! Bravo and well done. The world is able to see your site.