Oyster Lending and Borrowing with Solana DeFi
DeFi on Solana is at its early stages, come learn how to setup Oyster Lending


zappycode
4 min read
Jun 11, 2021
Intro
Howdy! Welcome to our tutorial on borrowing and lending with Solana. Solana is a cryptocurrency that aims to be a fast, cheaper, and better version of ethereum. We're gonna be walking through how to setup a website called "Oyster Lending" so that you can interact with Solana to borrow and lend your tokens.
If you're new to Solana, check out my last tutorial where I cover how to set up a wallet in Solana, make your own token, and NFTs!
Getting Started
Solana is a newer crypto and as such, doesn't have too much of a DeFi ecosystem to speak of. The devs at Solana are trying to help jump start things by creating basic tools in the hopes that people will adapt and use them. The code for the Oyster Lending project that we will be working with can be found here: https://github.com/solana-labs/oyster-lending
There's no info in the readme of the project but what we're looking at is a React app website that will help us with the lending. If you'd like to see a preview of what things will eventually look like, you can see a sample here: https://solana-labs.github.io/oyster-lending *Note: I'm not sure how up to date the code for that website is and I'm not sure how long it'll be running but it's helpful to have some idea where we're going
Setup
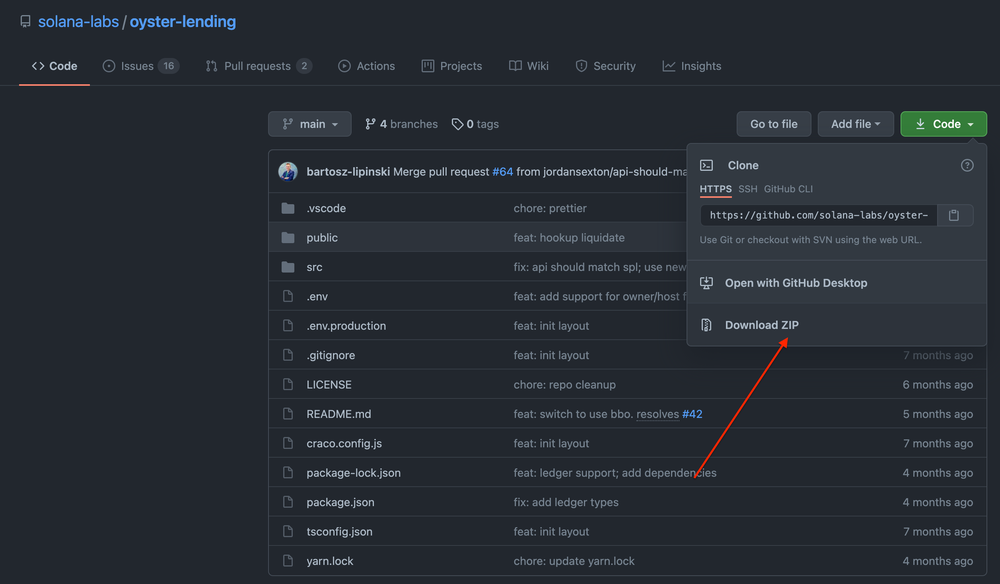
First let's download the code from the github repo. Hit the green code button and then choose "Download Zip"
Next, unzip the download, and then open your terminal if you're Mac or Linux, Command Prompt if you're Windows. If you're unfamiliar with working with the terminal, here's a good place to get started.
We'll then move to wherever our project is, mine is in my downloads so I did:
cd Downloads
cd oyster-lending-main
Then, to get our project working, we'll need npm (a pacakge manager). You may already have it installed so to test that, try typing npm into your terminal and hitting enter. If you get an output showing all the commands you can use and other info, that means you have it installed! If you get a message like "command not found: npm", you'll have to install Node.js. Pick the right download for your computer here and then go through the installation process.
After installation, try the npm command again. If it doesn't work, you may need to close and reopen your terminal for it to recognize the newly installed stuff. Don't forget to cd into the oyster-lending-main folder.
Installation
Once your npm is working, and you've moved into your oyster-lending-main folder, we're gonna install all the packages we need for our project to work by running the following:
npm installOnce that is finished, you may get some warnings about vulnerabilities but we'll leave that aside for now 😆 Next we'll finally get our project running by starting it!
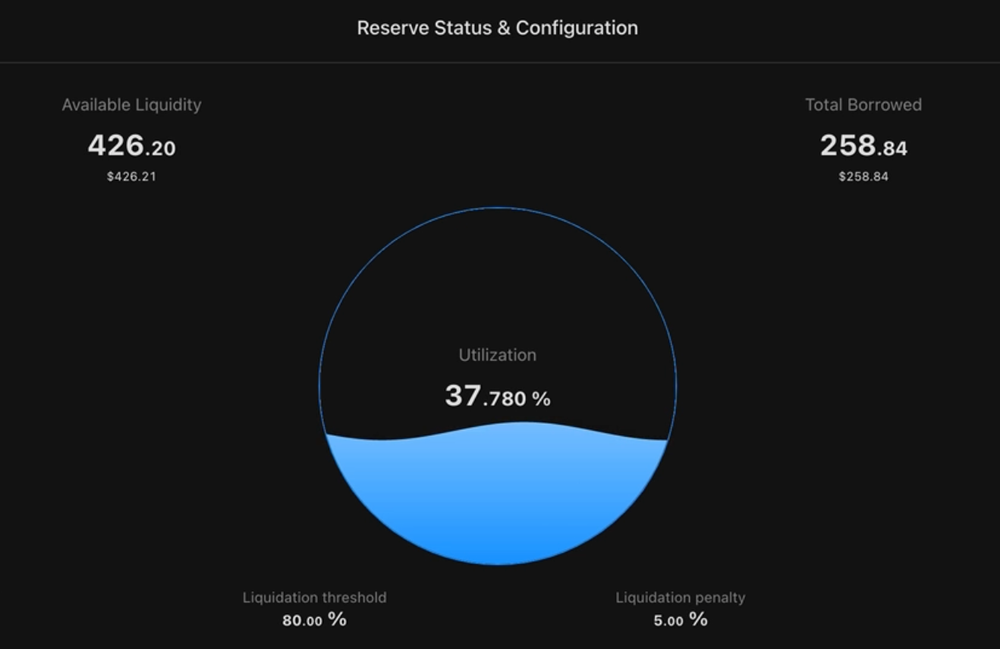
npm startThis should open a new browser tab for you and then it will take some time for the website to load. Mine took around 2 minutes. But once it's finished, you should see something like this!
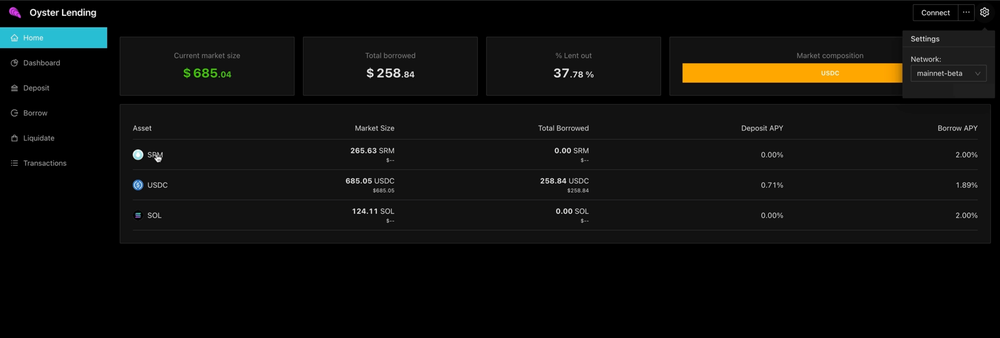
Congrats, we have it up and running! Now note, in creating this tutorial, I sometimes got it working, and other times I would hit some huge errors. Oyster-Lending is a little bit fragile at the moment so if you face issues you may want to hit up the project maintainer or Solana devs that can help you.
From here, play around with what's there. I could never get the devnet version of the site to work (you can access that by hitting the settings in the top right). But if you have some SOL to play around with, you can actually deposit or borrow the assets listed there on the mainnet. Pretty cool!
Making Some Chedda
A cool thing about the Oyster-Lending site is that if you were to host it live on the internet for others to use, you can collect a small fee anytime someone borrows or lends from it. It's your reward for hosting a place for people to easily work with the lending. To collect the fee, inside the project you need to edit the .env file. Now files with a dot in front of them are "hidden" files so you won't see it normally but you can use your terminal to do something like open .env that should open a text editor with that file. Then you can set your Solana public address to the LEND_HOST_FEE_ADDRESS variable.
If you'd like to see more of how the site works, watch the video at the top where I play around with it for a bit.
Thanks for coming along! It'll be exciting to see where Solana goes from here. I hope it can be all it claims to be. A world with fast, cheap, dapps, is a fun one 🙂